'%3e%3cg%20transform='translate(15%2015)%20translate(6%208)%20rotate(7)%20translate(-15%20-15)'%20opacity='0.7'%3e%3crect%20x='0'%20y='0'%20width='30'%20height='30'%20rx='8'%20fill='%23635bff'/%3e%3c/g%3e%3cg%20transform='translate(15%2015)%20translate(3%204)%20rotate(4)%20translate(-15%20-15)'%20opacity='0.85'%3e%3crect%20x='0'%20y='0'%20width='30'%20height='30'%20rx='8'%20fill='%233372f0'/%3e%3c/g%3e%3cg%20opacity='1'%3e%3crect%20x='0'%20y='0'%20width='30'%20height='30'%20rx='8'%20fill='%2300a9e0'/%3e%3c/g%3e%3c/g%3e%3c/svg%3e)
In CompanyCam
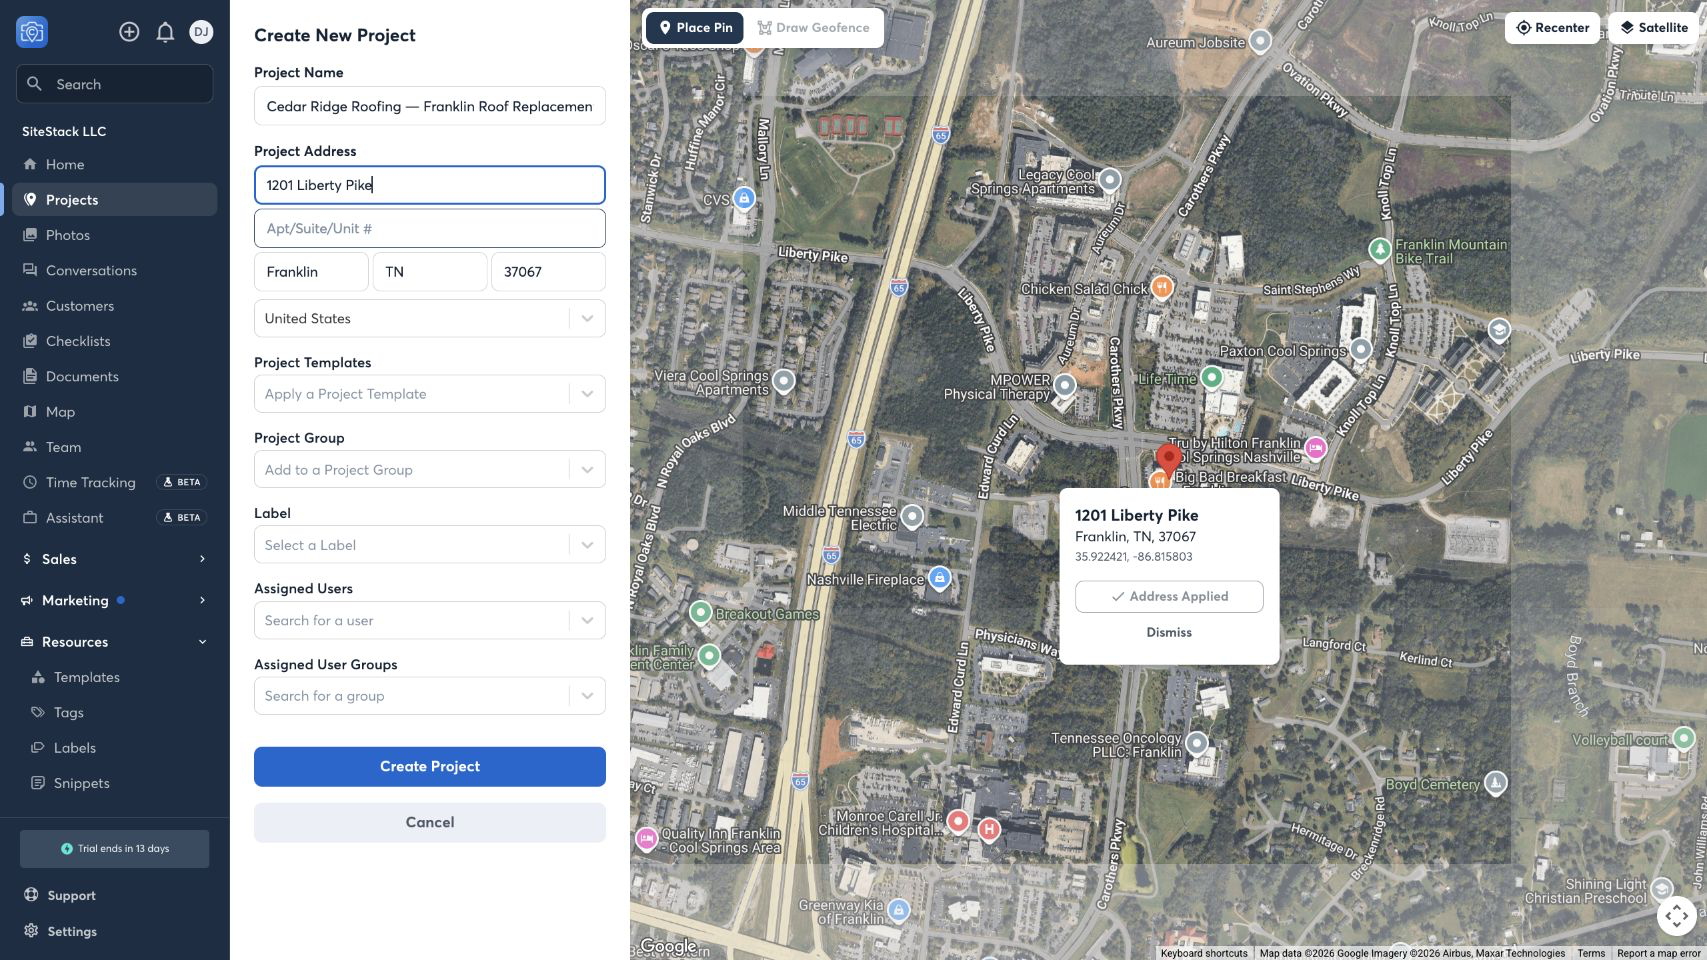
Create a project for the job
Create or open the CompanyCam project that contains the work you want to share. Use a clear job name so it is easy to find from SiteSeam.
 Integration guide
 Follow the complete workflow—from organizing a job in CompanyCam through authorizing the connection, importing approved photos, and reviewing the finished Reel in SiteSeam.
11 documented steps
Confirmation screens are called out explicitly. SiteSeam copies only the photos you approve and does not change the source project in CompanyCam.
In CompanyCam
Create or open the CompanyCam project that contains the work you want to share. Use a clear job name so it is easy to find from SiteSeam.
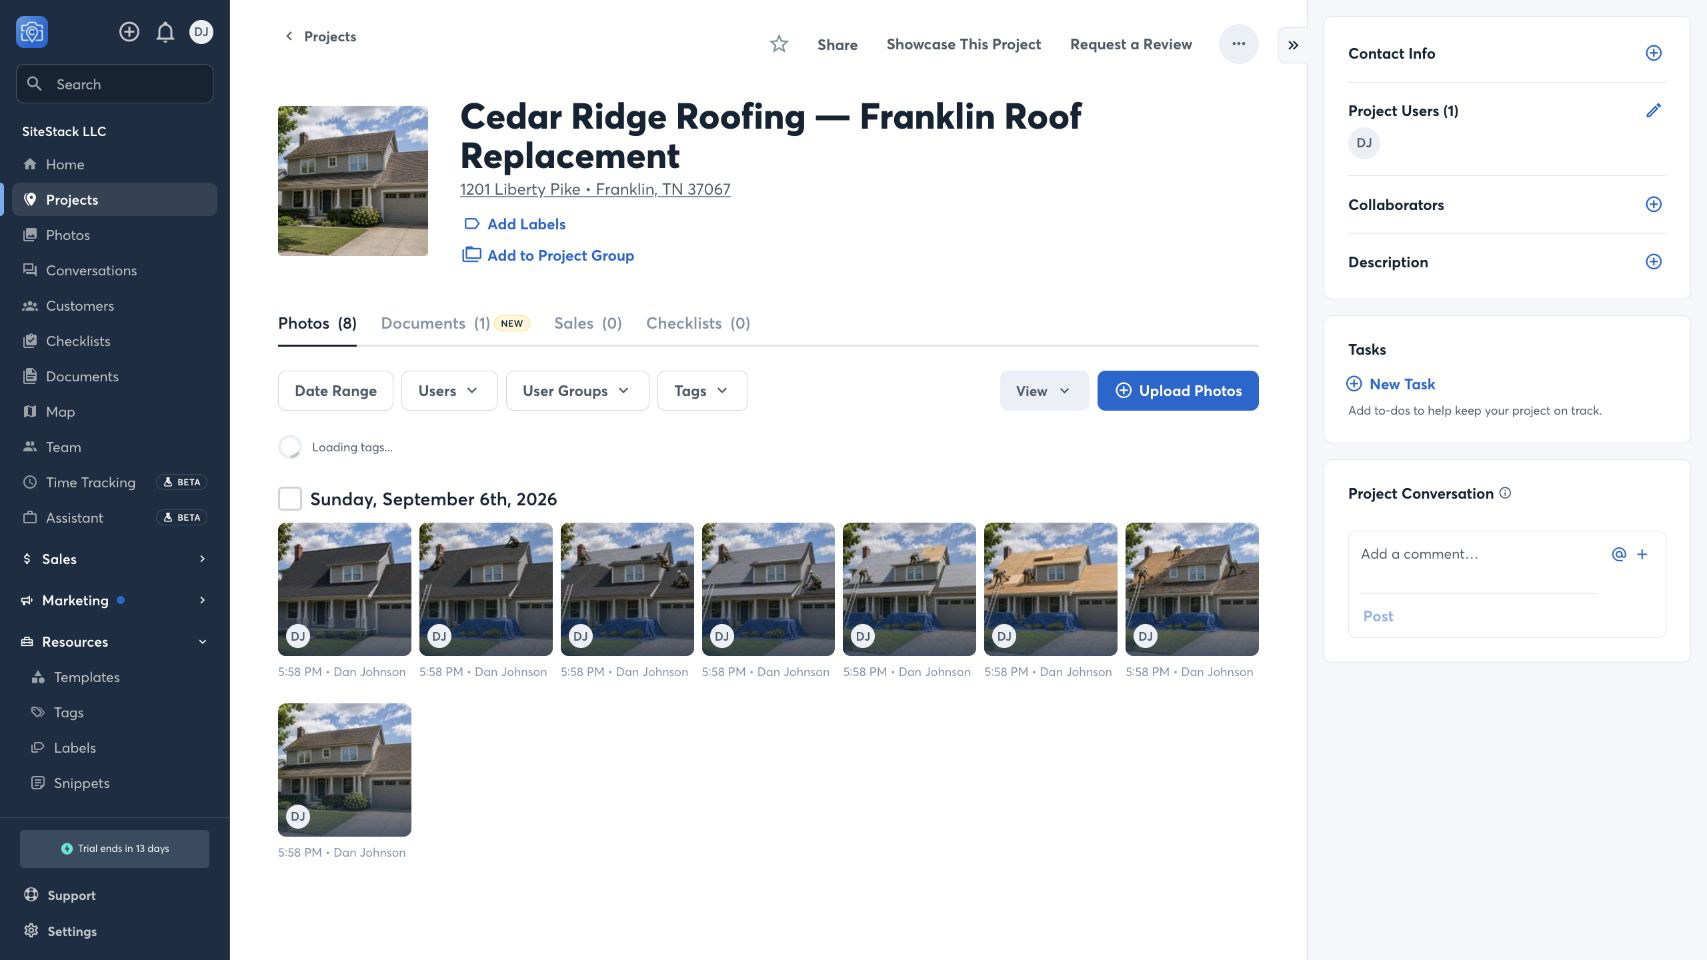
Confirmation
Confirmation screenCheck the project name and job details before adding media. This confirmation keeps photos organized under the correct job.
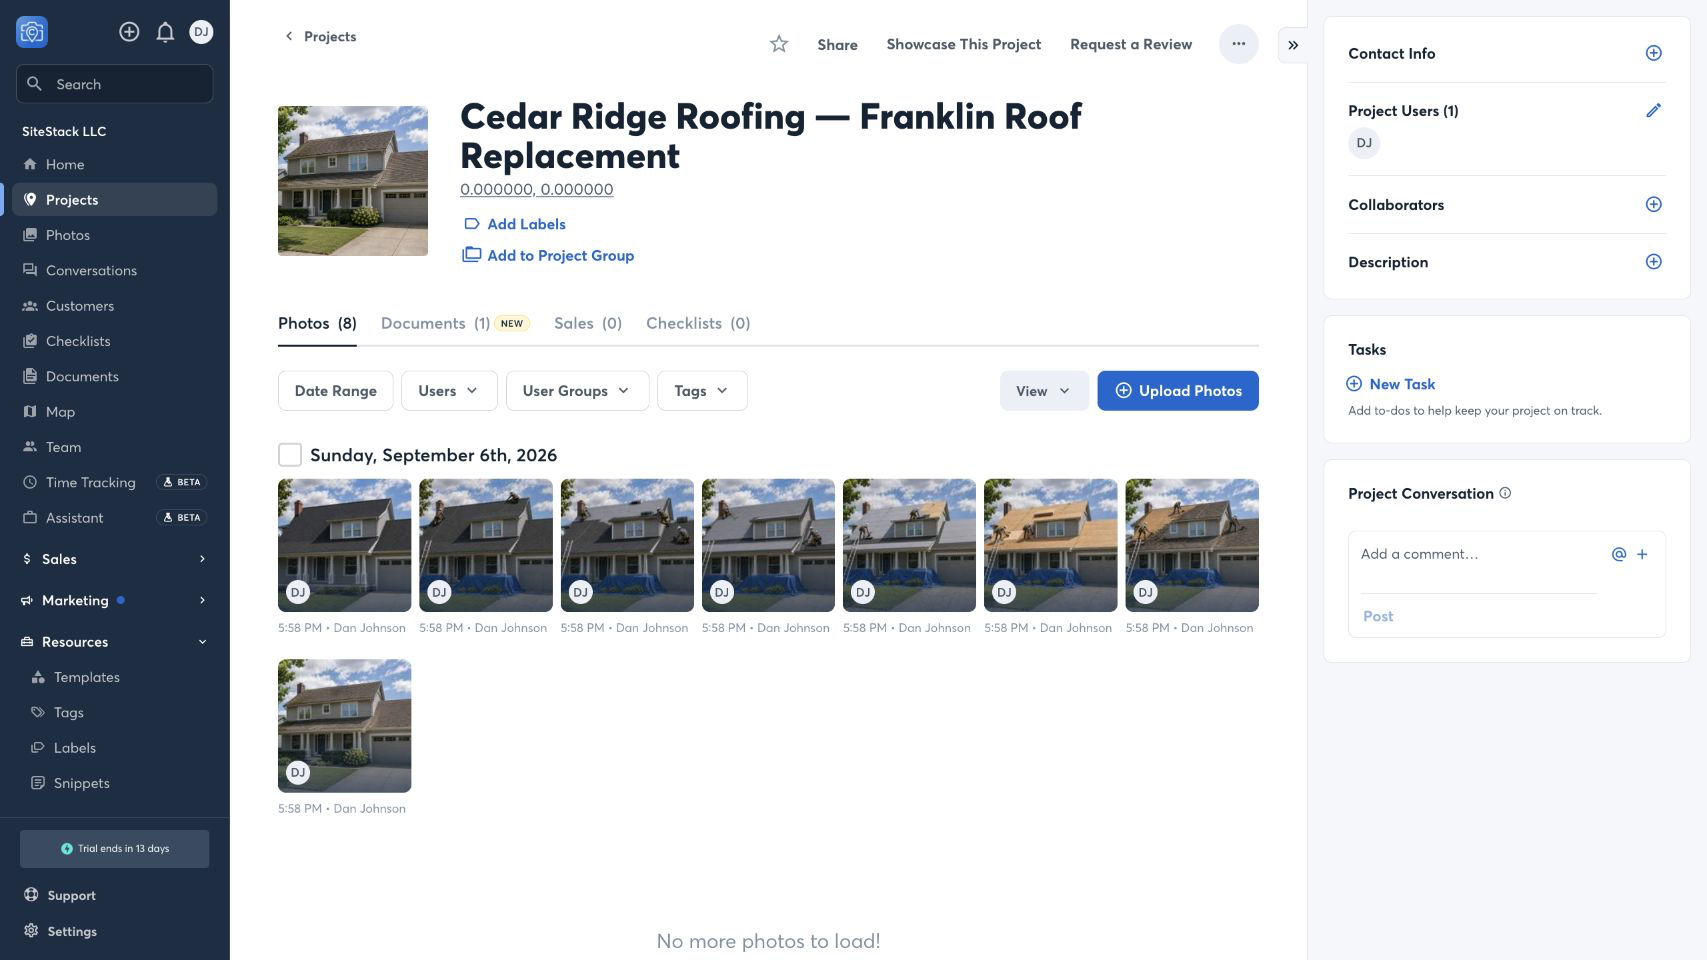
Confirmation
Confirmation screenOpen the project gallery and confirm that every job photo appears under the correct project before connecting SiteSeam.
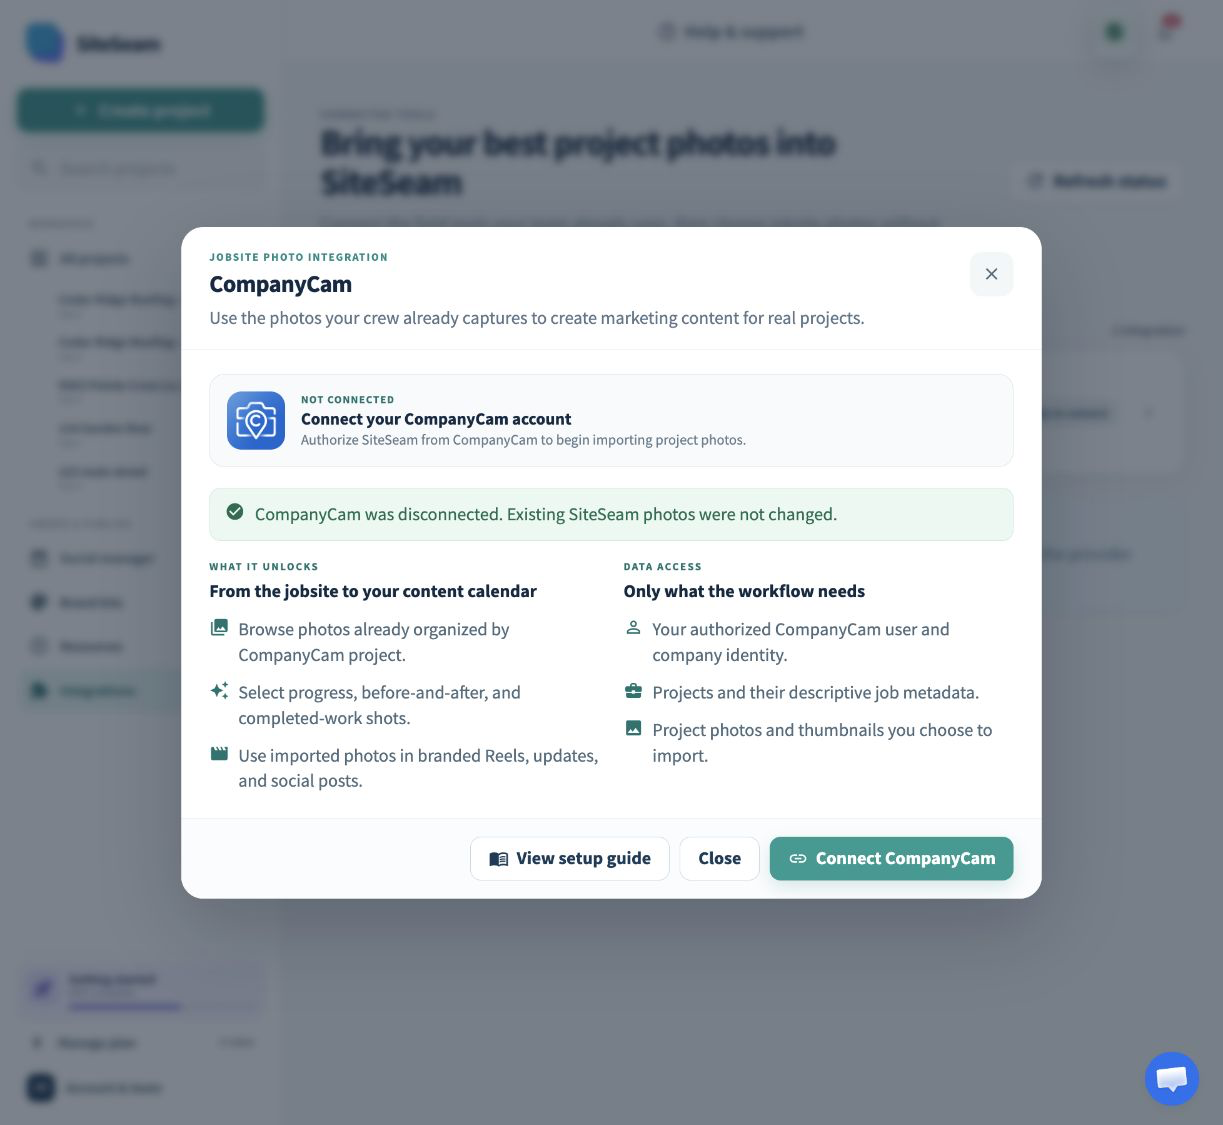
In SiteSeam
Open Integrations in SiteSeam, choose CompanyCam, and select Connect CompanyCam. Only a workspace owner or admin can manage the connection.
Confirmation
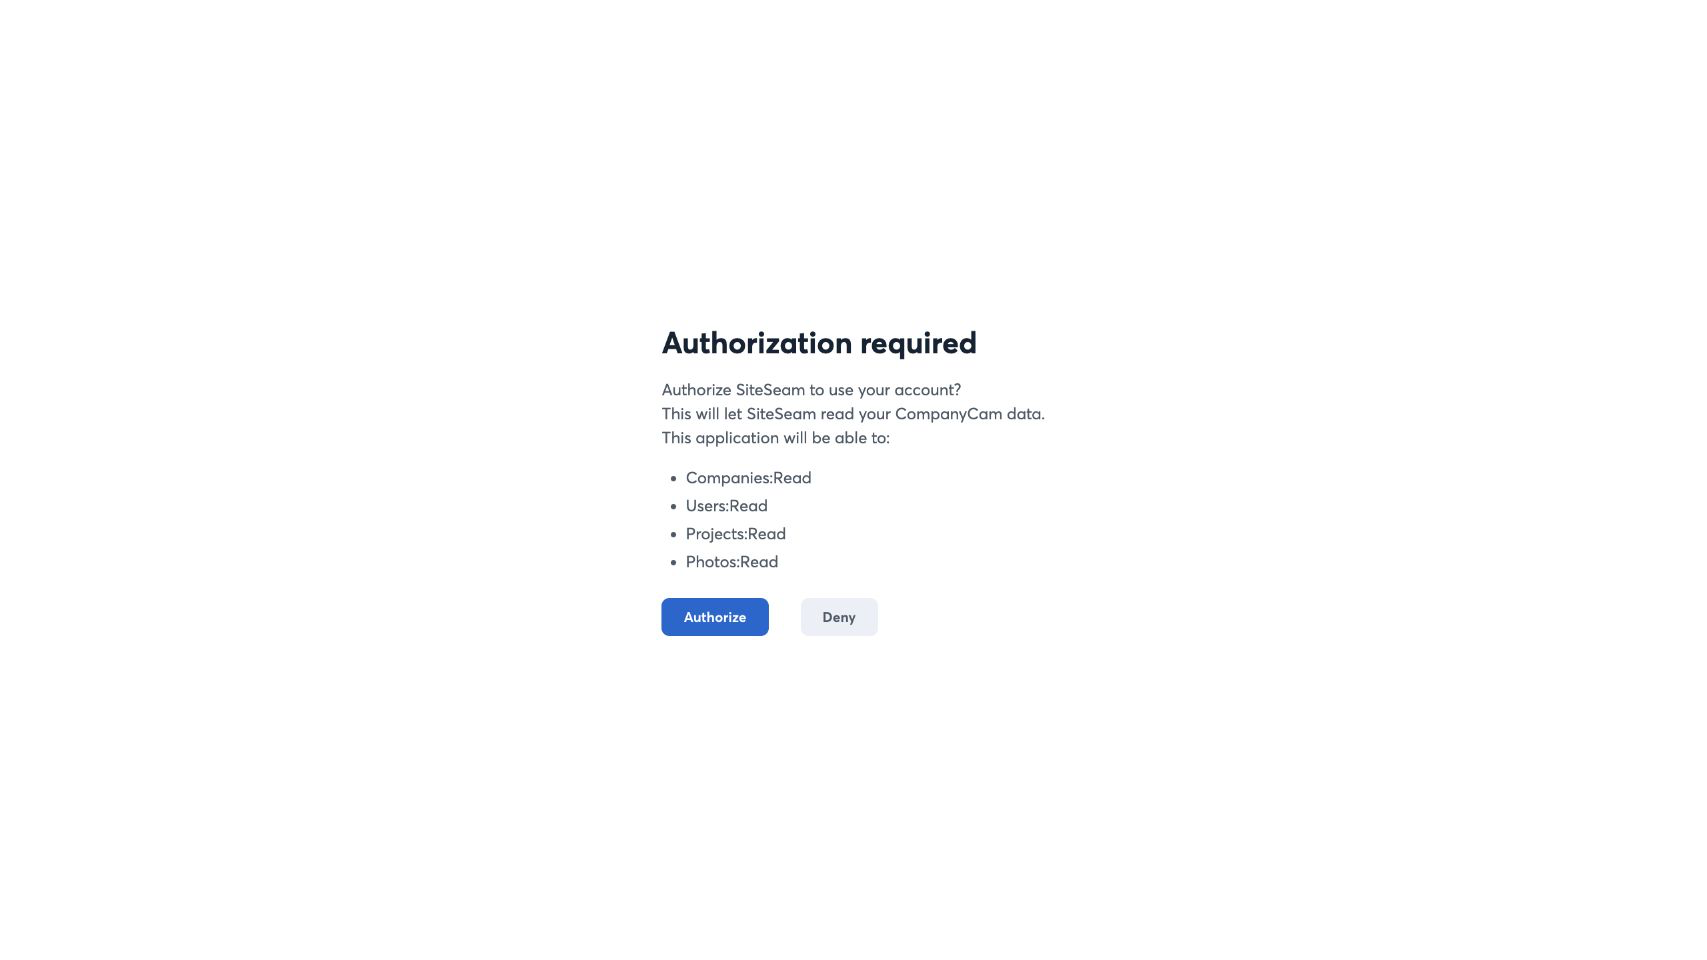
Confirmation screenApprove the four read-only Public API permissions for Companies, Users, Projects, and Photos. Your CompanyCam password is never shared with SiteSeam.
Confirmation
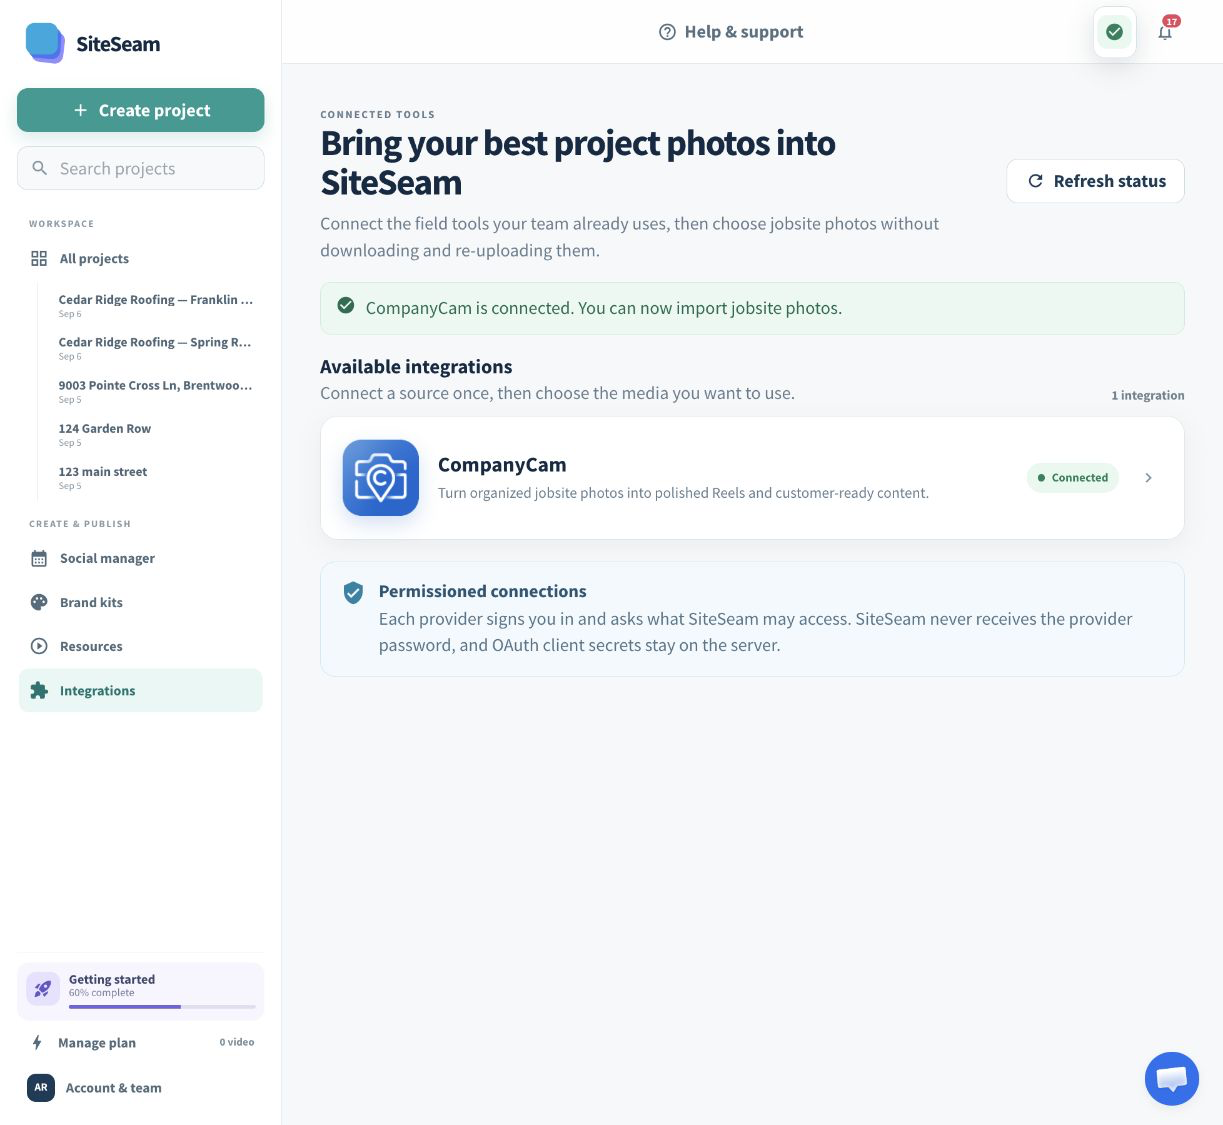
Confirmation screenSiteSeam confirms the connection and marks CompanyCam as connected. If access expires later, the same card guides an owner or admin through reconnecting.
In SiteSeam
Create a project for the Reel and give it a descriptive job name. This project will hold the imported originals and the content you create from them.

In SiteSeam
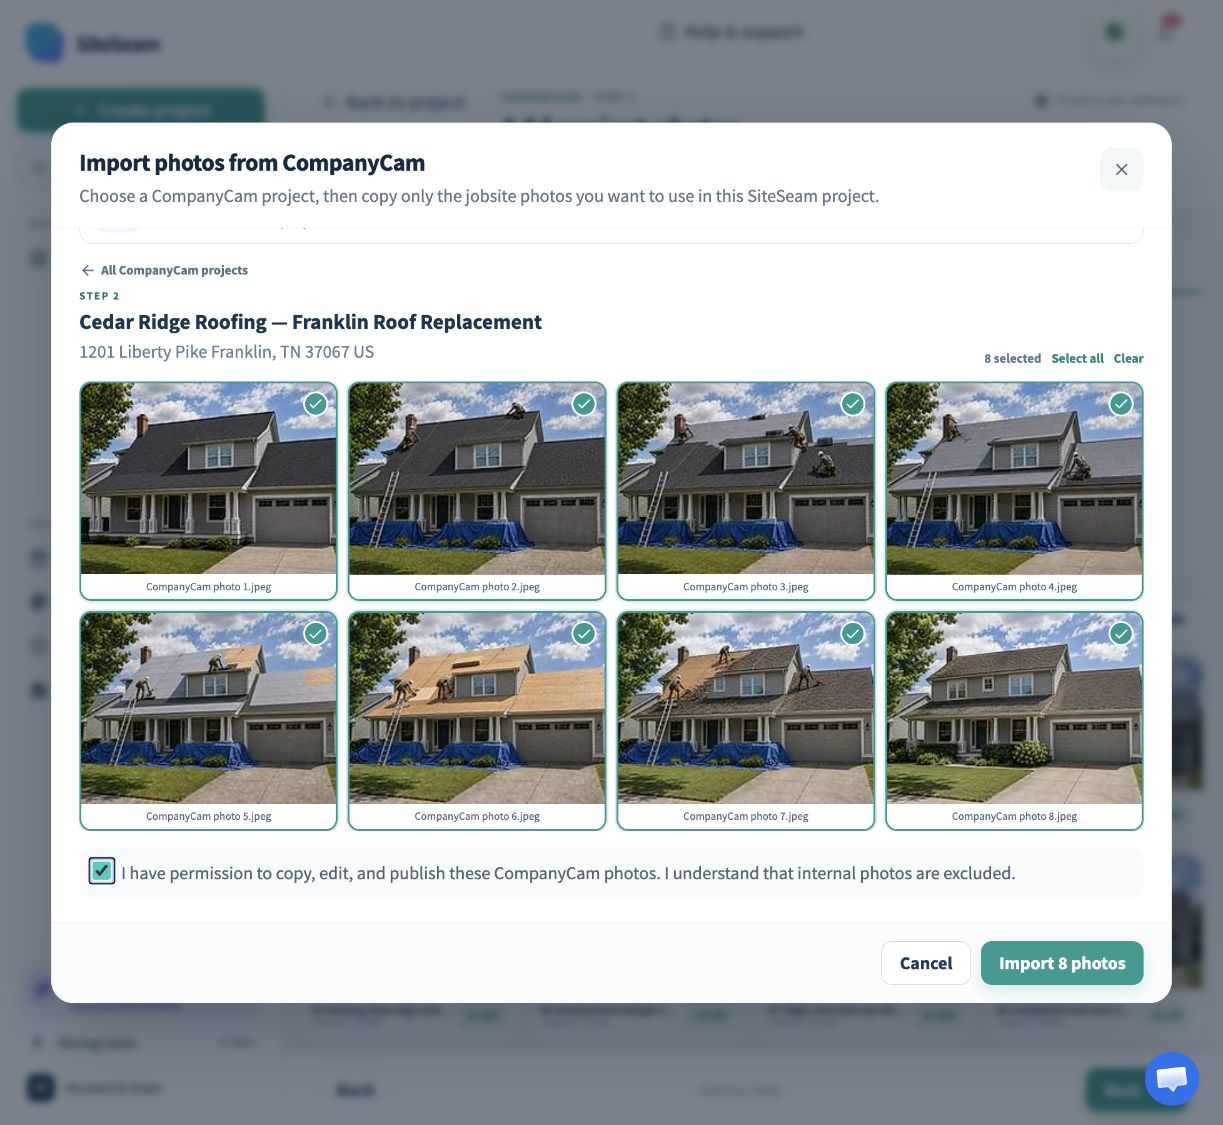
Select CompanyCam as the media source, open the matching job, and choose only the photos you have permission to use. Photos marked internal are not available.
Confirmation
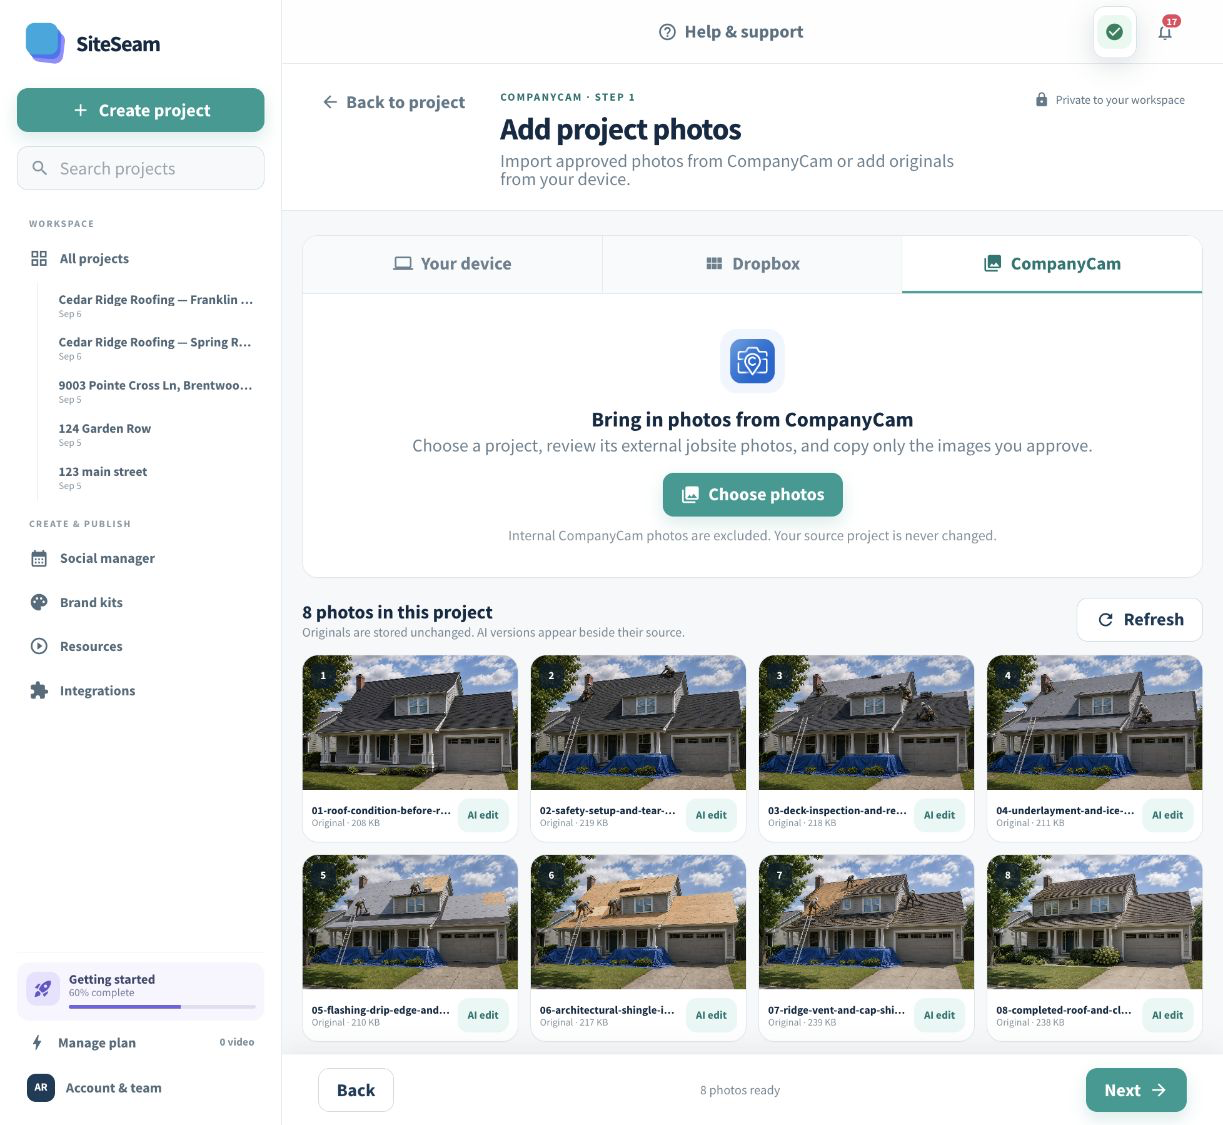
Confirmation screenAccept the media-rights statement and start the import. SiteSeam copies the selected originals into the project without changing the source project in CompanyCam.
In SiteSeam
Start a video, arrange the imported photos, choose movement and effects, then review the branding and format before generating.
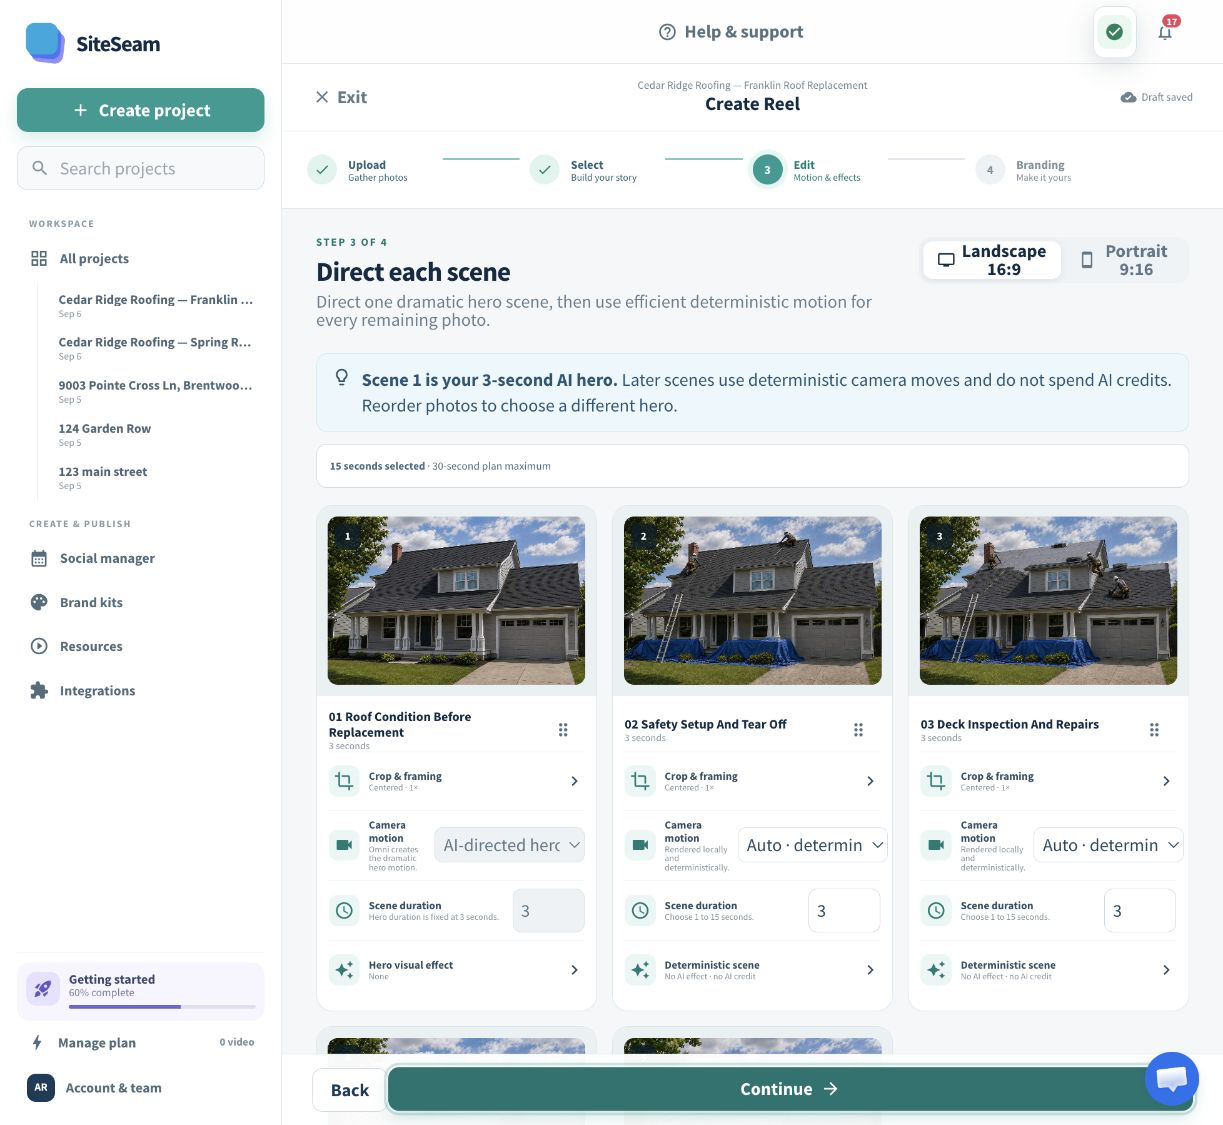
Confirmation
Confirmation screenOpen the finished Reel, review the result, and make any final adjustments before downloading or continuing to your publishing workflow.
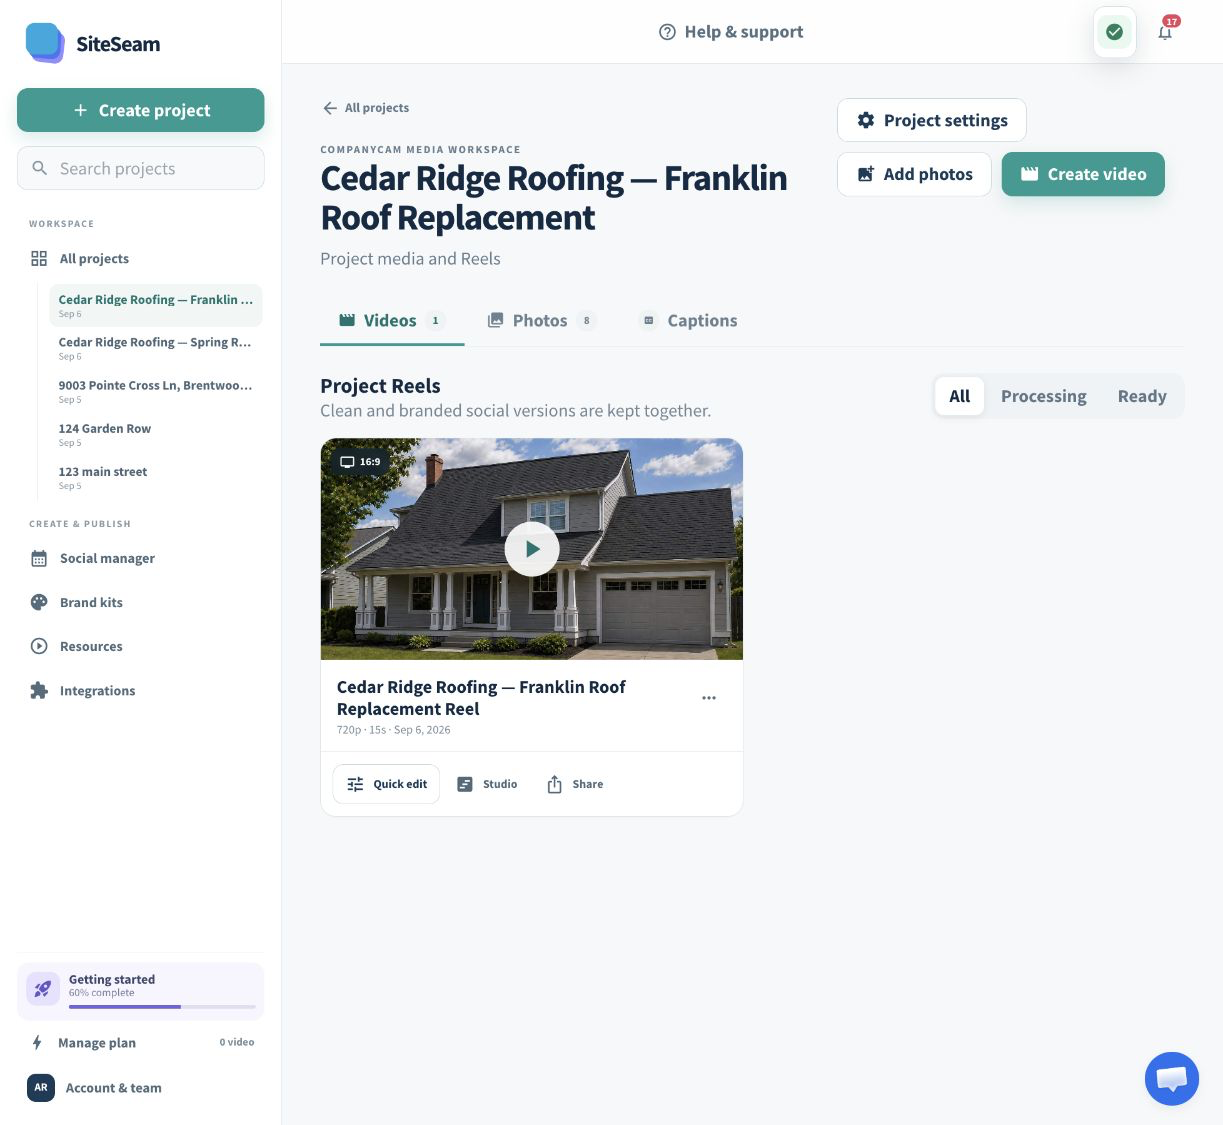
Ready to use your jobsite photos?
Choose an existing CompanyCam project, import the approved photos, and keep every Reel organized in one SiteSeam project.